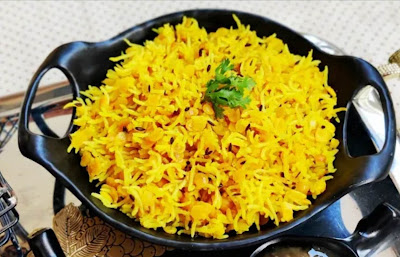
TOOR DAL KHICHDI RECIPE
Hello Foodies, welcome to our site www.checkmyrecipe.com , Today you will learn that how to make Toor Dal Khichdi Recipe Step by Step with Pictures,
This is also known as Arhar Dal Khichdi, This is complete meal recipe which is very easy and simple to make.
For Toor Dal Khichdi
INGREDIENTS REQUIRED
1 Cup Arhar/Toor Dal (100g)
1 Cup Basmati Rice (100g)
1 tbsp Ghee
1 tsp Cumin Seeds
1/4 tsp Asafoetida
1/2 tsp Turmeric Powder
1 tsp Salt
1 tsp Ginger
1 Green Chilli
Also Read
➡️Check More VEGETARIAN RECIPES
➡️Check More NON VEGETARIAN RECIPES
➡️Check More DESSERTS RECIPES
➡️Check More SALADS RECIPES
➡️ Check More SOUPS RECIPES
➡️ Check More DRINKS RECIPES
METHOD OF PREPARATION
1. Afyer Washing Soak both 1 cup Toor Dal and 1 cup Basmati Rice in water for atleast 30 minutes, Then it will looks like this as shown in picture below.
2. Now take a cooker, switch on the flame and then add 1 tbsp Ghee in it and when it gets hot then keep the flame low so that spices don't burnt after adding.
3. Add 1 tsp Cumin Seeds, after cracking sounds from this cumin seeds then add 1/4 tsp Asafoetida(Hing), 1/2 tsp Turmeric Powder a d mix it well.
4. Then add 1 tsp chopped Ginger, 1 Green Chilli which is cutted into longitudinally and mix it.
5. Now add soaked toor dal with rice mixture in this and cook this for 1-2 minutes with continuous mixing.
6. Now add 3 Cups of Water and mix it properly and then add 1 tsp Salt and mix it again.
7. Now close the cooker and switch the flame high and after 1 whistle, switch the flame low and pressure cook it for 5 minutes at low flame.
After 5 minutes, switch off the flame and let it as it is, so that all the steam released from this with own.
Now remove the lid from this cooker.
8. Finally our Homemade Toor Dal Khichdi Recipe is Ready to Serve.
TOOR DAL KHICHDI RECIPE VIDEO
Also Read
CONCLUSION
I hope that you have learnt this Arhar / Toor Dal Khichdi Recipe Step by Step with Photo Tutorial, Share this Recipe with your friends and family.
In this Recipe of Toor Dal Khichdi, Pictures credit goes to Respected CookWithMamta


ConversionConversion EmoticonEmoticon
Note: only a member of this blog may post a comment.